 |
| Martha's White Gold |

Unless you are living under a rock, you have probably noticed that gorgeous, shiny, metals are everywhere. Metals are hot in everything from home decor to fashion to crafting to Infinity-And-Beyond and I couldn't be happier. Ya see, it's about time the rest of the world caught up to ME. I have been rocking the metals for years. In fact, a few years ago I literally remember thinking that maybe I should stop using metallics in my projects because at that time NOBODY else was using them and I wondered if they were a wee bit outdated. Thank God I only listened to myself
shades of gold) and got to work creating magic.
 |
| Twinkling H20s |
for about 2 seconds before I grabbed my Encore Gold ink pad, my Martha Stewart white gold glitter, & some Twinkling H2O (in several shade of gold) and never looked back.
Now that the rest of the world has (finally) caught up to me, I can say that one of the best things to come of it is all of the great metallic products that are coming to market. From papers to embellishments to pastes, paints and tapes there are so many fun things to play with. One of the "tools" available is the Minc Machine. First Heidi Swapp released the 12 inch machine (retails for $149), recently both Heidi and Anna Griffin have released 6-in versions (retails for $79.99)
 |
| Heidi Swapp 12-inch Minc |
So what is a Minc? Let's be honest here, at 150 bucks the Minc is one expensive laminator. BUT-yes there is a but- it can do things a cheap-o laminator just can't pull off making it worth the splurge?!?!
ProTip: I got my 12-inch machine from Blitsy.com for $112 and they have run that special at least once more.
 |
| Anna Griffin Minc |
The larger Minc has a 12-inch opening which is much bigger than my cheap-o laminator ($20 Amazon). Heidi has come out with a 6-inch Mini Minc (retails for $79.99) and Anna Griffith has a 6-in Minc of her own available through HSN that retails for $79.99 but includes a 130 die cuts, 50 sheets of foil, 4 sheets of glitter and 6 toner sheets....HELLO!
So what can the Minc do? The Minc gives you the Midas Touch. At it's most basic it adds foil to any toner-printed image. The item to be foiled and the foil is fed through the Minc using a transfer folder. The folders come in 12x12" and 6.25x12" (or the original Minc) so you can use a smaller folder for smaller projects.
Heidi has a plethora of products that are all ready for foiling and readily available at JoAnn's and online retailers. You are tasked to pick which of the fun products you want to foil then chose a foil color, Minct hat baby and you have a personalized embellishment. Some of Heidi's ready-to-foil items include.....
3-D paper flowers $3.99
Chipboard Shapes $4.99
Toner Sheets $3.99
Jumbo Alphabet $9.99
Icon Stickers $2.99
6x6 5th Avenue Paper $5.99
Gallery Wall 5th Avenue $4.99
3D Butterflies $3.99
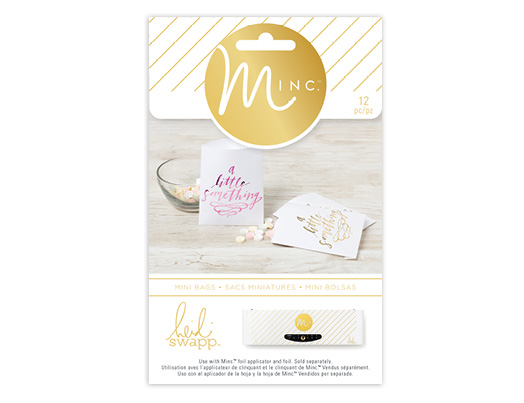
Mini Treat Bags $6.99
Mini Banner $7.99
This is just a peek into the many products available...there are also letters stickers, cake toppers, pinwheels, labels, cards, cupcakes wrappers and on and on. While I was grabbing the photos for the products from Heidi's website I found she has Christmas products I wasn't aware of and they are really cool. I will post some pics at the bottom of this post.
One of the best parts of the Minc is that it works with any toner (aka laser printer) image meaning you can create your own images. I have a cheap laser printer my husband bought off of an auction website for $25. Mine came from
Biddergy which is local for us, but there are a several websites that liquidate crap that business no longer use or need. My printer is big and old-and only prints in black-but it works. Don't have a laser printer? No worries, stores like Fed Ex Office or your local printing shop will print your creations. Don't want to deal with toner-based images? There are other ways to add foil to your projects and I will talk about those in another post.
Okay, so we know the Minc is wider than your cheap-o laminator but that isn't worth $150? What else ya got? The Minc has 5 heat settings, allowing you to foil a variety of media including vellum and acetate. You can't do that with your Amazon Laminator ;)'.
ProTip: Heidi Swapp Minc products have the recommended heat setting on the back of the package (I just learned this today). Go to Heidi's blog to read about
Using Your Minc On Different Surfaces.
Bigger, 5 temps, different paper surfaces are all good but what else? The Minc isn't limited to just different paper surfaces. What, what? Because the height of the opening is (slightly) taller than a regular laminator, you can foil chipboard and even the wood-veneer embellishments that are all the rage right now. Heidi has a ton of projects on her blog with all different items at
HeidiSwapp.com, on her
Instagram. She has a Pinterest board for
Minc Projects where she Pins not only projects, but also free digital downloads suitable for foiling.

You can also check out her channel
Create To Remember on My Craft Channel. (If you haven't ever been to My Craft Channel I suggest you check it out. The site offers free how-to videos from a variety of bloggers in many different media over 15 "seasons". Heidi's projects are ALL amazing and she has quite a few Minc tutorials. Heidi has done all 15 seasons so check some of her older stuff out while you are there. AS for the other shows....they run from great to bleeeech to seriously? You have been warned!)

Want to do some of your own projects but don't have the images?
- The Graphics Fairy is a great source of free digital images in a wide variety of styles. She also offers amazing bundled images available with a Premium Membership ($6.98/monthly or $69.88/yearly). You can read more about her terms here.
- Rhonna Designs has long been one of my favorite sources for digital images and fonts.
- Kerri Bradford offers images for sale as well as freebies. Keep in mind that line images are what you want; shaded images with just be a big blur...ask how I know that.
- Heidi Swapp has freebies on her website
- Snap Click Supply has a variety of brushes and images
The final advantage of hte Minc over my el cheap-o laminator is the REVERSE switch- more about that below.
I've been a foiling fool so I have a lot of projects to share, but first I wanted to show the basics of what the Minc can do but please bear in mind it is very difficult to photograph just how shiny and beautiful the foiling really is.
Print a page of toner- or buy one of Heidi's packages of toner papers- chose your color and make a gorgeous mesmerizing metallic paper than use this paper to make beautiful die cuts.
 |
| Looks it's like a fun house mirror....fat arm....skinny arm..... |
Below is a tag I made using one of Heidi's tags that says "smile" and I added sequins and a few other embellishments and inked the edges. How did I make the bigger tag? Oh....Bwahahaha stay tuned.
 |
| 6x6 5th Ave. Paper in Gold and Pink foil |
I will confess that I have jumped on the planner trend and have been making a lot of fun bits and bobs for my family to add to their planners. Most of my Minc projects are for planners but could easily be adapted for scrapbooking, Pocket Letters, or cards. I will posting those projects soon but the group of fun tags below is a tiny little sneak peak
The projects in this picture were foiled using gold, rose gold, pink and silver foils. Heidi just came out with several new color and Deco Foils makes a ton of colors. I have an order coming from Blitsy that includes iridescent, opal, pumpkin, pink melon and two satin colors-turquoise and magenta. Ranger has small packages of foils including an interesting "Vintage" color set.
My Minc ate my homework: My foray into foiling hasn't been all rainbows and butterflies. My first Minc machine kept pulling the cover sheet into itself crooked and when that happens the machine eats the project. After every single project I sent into it was eaten up I contacted Blitsy and they sent me a new machine. I used the new one for quite awhile before it got hungry and ate a project. I don't know what it means when the same day my cheap-o laminator ate a project as well. WTH? It is crazy to send something into the Minc and look away for a moment and your project is just *POOF* gone. But soon the smell of burning plastic hits your nostrils and you know right away where that baby is. After I had 3 laminators with plastic constipation, I decided to open them up and (possibly) clean them out. After I opened the cheap-o laminator I decided it wasn't worth the time and effort to fix it and it was tossed. The insides were cheap and electronic chippy-looking things were easily pulled apart so I had little faith it would ever work. Plus I couldn't get the rollers back into alignment.
I opened the first Minc and I will tell you that the price difference comes with a much better made machine. The inside of that thing is STURDY and the rollers are very well made and heavy...aka too much for me to deal with. Soooo I laid it aside until my husband came home and then I tasked him to fix them both....and he did. Armed with my WORKING machines I set about making more projects and everything went well until the first machine ate another project. I haven't told the hubby yet :D (I love you). I will say that if you sit and watch the project go in you can hear a funny crinkling noise when it is about to be eaten. Now is the time to use that Reverse. The problem comes in that watching a laminator is about as fun as watching paint dry and after 10 projects go through with no problem I start to get antsy and decide that I can cut some die cuts on my Vagabond while I foil. I get distracted and BAM that thing is eating not foiling.
So, that is everything that I think, know, feel and wanted to share about the Minc. I have two projects coming up that I am so excited to share I just about can't stand it so come back soon.
Danee
Some Minc Christmas Fun:
This post was linked to the following:


